Tuesday, February 26, 2013

Easiest Broccoli Ever!

All you need it fresh broccoli, whatever amount your family will eat, there is no magic amount.  Cut the florets off of the stem, and place on a nonstick cookie sheet
 
 I added a few red peppers and onions I had in the fridge, then squeezed fresh lemon juice to lightly coat, then salt and pepper to taste.  Pop in the oven at 400 degrees for quick heating.  I can't even tell you how long, but you don't want them brown.  I do not even wash the broccoli to keep it from being soggy.  If germs can survive 400 degrees in an oven, more power to them!

I just happened to serve this broccoli with yukon gold baked potato salad and a barbequed pork chop.  
 ** Sarcasm NoteI worked like a dog on this meal!  Made the salad yesterday, popped the chop in the oven and when it was done threw in the broccoli for a few minutes.  I'm a hero people, a hero! 

Yukon Gold Baked Potato Salad

This "salad" can be served cold or hot, each member of my family has their own preference for how they like to eat it.  I like either :) 


Here is what you need:  12-14 Yukon gold potatoes, 8 strips of bacon, 3 green onions, 1/4 cup of mayo, 1/2 cup light sour cream, 1/2 cup cheddar cheese, salt and pepper to taste. 

I know Yukon Gold's do not have thick skin like a russet, but I have grown people in my house who act like I fed them hair if I leave the skins on.....therefore, I peel and boil my potatoes.

While they are boiling I fry the bacon, chop the green onions, and shred the cheddar. 

When the potatoes cool, add your mayo and sour cream to coat.
When you have them coated add your onions, bacon, cheese salt and pepper and serve. Like I said, it will be cool and you can serve it like that or heat in the microwave for those who like their cheese melted.  But this dish can be made ahead of time and served the following day or taken to a picnic ect.  ENJOY :)    
 **Sarcasm Note:  If you want to skip frying your own bacon, you can use artificial bacon bits.  I'm sure it would be just as good.


Elisabeth Hasselbeck's Orange Cupcakes


Elisabeth Hasselbeck is a Christian wife and mother, talk show host, and health nut that happens to have Celiac Disease.  Because she does you can find many Gluten Free Recipes on her website www.elisabethhasselbeck.com.  Tonight I made her Orange Cupcakes and they were very easy to put together.  I did notice they needed cooking a few minutes longer than she said, maybe it's the altitude.  Either way, I was pleased with being able to use some of my coconut flour so I doubled the batch.  I will give you the recipe for one batch of about 12-16 cupcakes.

Here is what you need:


1 cup brown rice flour, 1/2 cup coconut flour, 1/3 cup tapioca starch, 2 teaspoons baking powder, 1/4 teaspoon xanthan gum, 1/4 teaspoon salt, 1 cup granulated sugar, 1/2 cup canola oil, 2 eggs, zest to taste of 1 orange, juice of 1 orange, 1/2 teaspoon orange extract, 1/2 cup 2% milk, 1= 8 ounce cream cheese at room temp. 1/2 cup powdered sugar and 1/2 cup gluten free light sour cream.

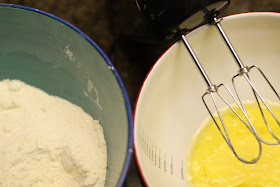
In a medium bowl, combine the flours, starch, baking powder and xanthan gum and salt.  In a separate small bowl add your milk, orange zest, juice and extract.
In yet another bowl add granulated sugar, oil and eggs one at a time while beating together.  Add half of the milk mixture and mix together slowly, then add the remaining milk mixture to complete.

Now to your wet mixture, add your flour mixture one spoonful at a time, slowly, until it forms a beautiful batter.  Mine was a little thick and I turned out not adding one or two spoons.

Add batter to cupcake tins and bake at 350 degrees for 15-20 minutes.

While cupcakes are in the oven make the frosting by beating the cream cheese and sugar together until smooth. Then gradually beat in the sour cream and chill until all cake are cooled.     

Once they cooled I piped my frosting on with a baggie snipped from the corner.


 *Sarcasm Note:   The remaining of the batter in the baggie did NOT get squeezed into my mouth like a 2nd grader.

Sunday, February 24, 2013

Two Teaspoon Chicken (Gluten Free)


So, let me make this perfectly clear before we begin...this recipe is NOT difficult once you get your spices and flour mixed.  You may want to even put half of your flour and spice mixture in a baggie for using later.  You will not use it all.  But here is where the truth comes in, and I'm all about the truth.  
John 8:32 says the truth will set you free....and it will! 

This chicken is good.  This chicken is Gluten Free.  But this chicken is also just as good without all of the spices.  It just is.  You can't taste all of that!  So you decide what you want to do.  The next time I make it, I will do just the salt, peppers, flours, crumbs and wet mixture prior to frying along with the sauce.   That's the truth. 

Here is what you will need: 
4 chicken breasts cut in half horizontally so they are super thin, (making 8 pieces) 1-1/3  cup of brown rice flour, 1/4 cup of tapioca flour, and 1/4 cup of GF bread crumbs. TWO TEASPOONS of each: sea salt, pepper, ginger, thyme, sage, paprika, cayenne.  3 eggs, 1/4 cup milk, TWO TEASPOONS Tabasco sauce, 4 Tablespoons olive oil, 1 cup honey, 1/4 cup soy sauce, TWO TEASPOONS fresh garlic minced


First mix all of your flours, bread crumbs, and spices together.


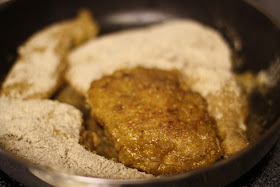
Whisk together your eggs, milk and Tabasco. Dip chicken in this and then dredge in flour mixture for frying.  Heat 2 Tablespoons of olive oil on a medium LOW heat and when your chicken is coated, place in pan.  Brown on both sides.  If you are uncertain if it is cooked, cut into the thickest piece. You may be able to get away with a medium heat.  


While your chicken is browning,  to make certain your kitchen doesn't begin to stink & become filled with black smoke...take a paper towel and wipe out extra dry flour that may burn.  You can add a little more oil if needed.  OK now...


Let's start the sauce in another pan.

The sauce is so simple! In a small sauce pan combine TWO TEASPOONS olive oil and your TWO TEASPOONS minced garlic.  When garlic is tender, add 1/4 cup Gluten Free soy sauce, and 1 cup honey on a low heat. Stir occasionally until all your chicken is cooked. I have a trick to see if my meats are cooked throughout...take the thickest piece and cut into it.  If it's cooked they all are, if not...I throw a small lid over the chicken and turn down heat until the meat is white.  

Once your chicken is completely cooked, dab excess oil and place on non stick cookie sheet, and cover with 3/4 of the sauce, saving other for dipping.  
Place on broil in the oven until the sauce is bubbling and thickening and then serve. 


 I usually fix a quick pre-packaged cole slaw while it's in the oven...
 Again, this is a good gluten free fried chicken breast.  I adapted it using many different cook books and recipes.  But I will go to the grave saying I cannot distinguish all the different spices and won't use them again. 

*Sarcasm Note I love making an extensive meal and have it turn out that it was not all necessary!  :(


Wednesday, February 20, 2013

Maple Breakfast Caserole (make ahead)

Maple Breakfast Casserole

As you have probably learned by now, I do not cook difficult meals.  This falls right in with the quick and easy!  Again, mine is gluten free as I used my gluten free bread which I made from the Gluten Free Pantry box mix.  
But you can use whatever bread you desire. 

Here is what you will need... 1 pound maple flavored sausage cooked and drained, 2 cups milk or soy milk, 8 eggs, 2 teaspoons of vanilla, 2 teaspoons of cinnamon, 1/4 cup of pure maple syrup, 
2 cups of cheddar to top at the end of baking, 
and bread of choice cubed to place in the bottom of your baking dish

Preheat your oven to 350 degrees and place cubed bread in sprayed baking dish
SO PRETTY  

In a bowl whisk together your 8 eggs, syrup, cinnamon and vanilla with your 2 cups milk


Place your cooked and drained sausage on top of your cubed bread, then pour your milk and egg mixture over the top.  Refrigerate over night, or for at least 3 hours before cooking.  Bake uncovered for 30 minutes then top with cheddar to bake an additional 10-15 minutes or until the center is solid and not watery.  Let it cool for about 5 minutes and serve with a nice fruit salad. 


This dish is supposed to taste like a McGriddle at McDonalds,,,
I think it's better 
and certainly healthier. 

Sarcasm note:  I'd much rather have breakfast at McDonalds.... uh NOT! 


Monday, February 18, 2013

Green Nachos (gluten free)


GREEN NACHOS

Here is what you will need:  1 pound hamburger, Tomatillo sauce, 1 can pinto beans, sour cream, salt and pepper to taste, 1 jalapeno seeded (unless you like it HOT), chips of choice, 1-2 cups cheddar, and an avocado.  Please feel free to use whatever toppings you'd like.  Tomatoes, lettuce ect...

I like Jardine's TOMATILLO

Brown your meat, and while it is browning, place your beans with the juice, in a pan. Add two heaping tablespoons of Tomatillo, and two heaping tablespoons of sour cream.  Salt and pepper. 


 Then add your jalapeno with or without seeds, stir to combine and simmer on a medium heat. 
Once your hamburger meat is is cooked, drain and add to your creamy beans!
This is what it will look like...yummy :)


You can choose whatever chip is your favorite, my son REALLY likes fritos.  Top with your cheddar and then top with your meat mixture.  Garnish with GREEN avocados, GREEN onions, tomatoes, GREEN lettuce, or more sour cream!  It's YOUR meal, go for it!


If I add GREEN avocados to anything, I always add a little GREEN lime juice to keep from browning and, it adds a kick! 
  
ALWAYS A HIT!

Nutella Coconut Popsicles

Want a quick, easy, healthy enough, treat that will have your kids cheering your name? 

"Mommy, Mommy, Mommy!"

Well, it's not a dream...

Take one can of coconut milk, and 1 cup of nutella
If your coconut milk has solidified, put it in the blender alone and blend until frothy, add  your nutella and blend for about 30 seconds. 

 
Pour into your Popsicle container, it will make about 10


NOTE:  I like to put some complementary fruit in the top which #1 holds the sticks in place and #2 gives you one great last bite. 
This recipe is great with bananas...

I think your Pops may like a pop!  


How I store my spices


You could probably care less about how I store my spices, but then again you are reading this!  First things first...I am OCD.  I tried putting my spices in alphabetical order but apparently not everyone in my home knows their ABC's. (Scratch that)  Then I tried putting the spices I used most on the lower shelves, but my oldest decided he enjoyed cooking and used weird spices.  (scratch that)  Now, he lives in Nashville, I am the only cook in the house once again and I have the perfect solution for ME.  I hope it helps you as well.

I ordered these little gems from organize.com (of course)  They are 4 oz. stainless steel spice cans.  You can order their magnetic version but they are a bit more expensive.  I know it sounds ridiculous, but I had so much fun organizing this!  
  1. The tops of the containers are clear so you can see the amount you have leftTherefore, if you're getting low you will know before it's too late. 
  2. They have a wonderful little ridge on them to write with a sharpie marker what spice is inside. (in case you stack like I did)
  3. They are stainless in case you want to place magnets on them yourself.
  4. They are easily stackable as you can see.
  5. They are CUTE. Period.  
   
That being said, here are a few tips on how long you should keep your spices.  But to be honest, just look and see if the colors are faded or their smells have lost a little kick!  
 

Red-colored spices, such as chili powder, cayenne pepper and paprika can be refrigerated to prevent loss of color and flavor if you don't use them regularly.  The best storage temperature for herbs and spices is one that is fairly constant and below/around 70ยบ F. Temperature fluctuations can cause condensation if you live in a humid climate, and eventually mold, so if you store spices in the freezer or refrigerator, return them promptly after use.

The shelf life of each herb and spice is different, and all age, even under the best conditions. The shelf life of herbs and spices will vary according to the form and plant part, too. Those that have been cut or powdered have more surface area exposed to the air and so lose their flavor more rapidly than whole herbs and spices.

Here are some storage guidelines:

Whole Spices and Herbs, Leaves and flowers: 1 year


Seeds and barks: over 2 years


Roots: over 2 years


I adore spices...
  • Romans were paid in salt, they sent it back home to preserve the family's food. We get our word "salary" from the Latin word for salt... Sal
  • Europeans explored lands beyond just for spices
  • Wars were fought for spices and the ability to trade them
  • Egyptians were buried with spices 
Most importantly:  I don't care if sugar is not a spice; 
I want to be buried with it!    


Are you worth your salt?

How to Properly Use Spices in Cooking

Ecclesiastes 3:1 there is a time for everything, and a season for everything under the heavens...   

We both know Ecclesiastes is not talking about seasons in the way of cooking.  But but just as seasoning can add flavor to food; Jesus can add flavor to our lives.  


Here are the seasonings that add the best flavor to the foods you cook... 


Beans — cumin, cayenne, chili, parsley, pepper, sage, savory, thyme
Beef — basil, bay, chili, cilantro, curry, cumin, garlic, marjoram, mustard, oregano, parsley, pepper, rosemary, sage, savory, tarragon, thyme
Breads — anise, basil, caraway, cardamom, cinnamon, coriander, cumin, dill, garlic, lemon peel, orange peel, oregano, poppy seeds, rosemary, saffron, sage, thyme
Cheese — basil, caraway, celery seed, chervil, chili, chives, coriander, cumin, dill, garlic, horseradish, lemon peel, marjoram, mint, mustard, nutmeg, paprika, parsley, pepper, sage, tarragon, thyme
Chicken — allspice, basil, bay, cinnamon, curry, dill, fennel, garlic, ginger, lemongrass, mustard, paprika, rosemary, saffron, sage, savory, tarragon, thyme,
Corn — chili, curry, dill, marjoram, parsley, savory, thyme
Eggs — basil, chervil, chili, chives, curry, dill, fennel, ginger, lemon peel, marjoram, oregano, paprika, parsley, pepper, sage, tarragon, thyme
Fish — anise, basil, bay, cayenne, celery seed, chives, curry, dill fennel, garlic, ginger, lemon peel, mustard, oregano, parsley, rosemary, thyme, saffron, sage, savory, tarragon, marjoram
Fruits — allspice, anise, cardamom, cinnamon, cloves, coriander, ginger, mint

Potatoes — basil, caraway, celery seed, chervil, chives, coriander, dill, marjoram, oregano, paprika, parsley, poppy seed, rosemary, tarragon, thyme

Salads — basil, caraway, chives, dill, garlic, lemon peel, lovage, marjoram, mint, oregano, parsley, rosemary, tarragon, thyme
Soups — basil, bay, chervil, chili, chives, cumin, dill, fennel, garlic, marjoram, parsley, pepper, rosemary, sage, savory, thyme
Sweets — allspice, angelica, anise, cardamom, cinnamon, cloves, fennel, ginger, lemon peel, mace, nutmeg, mint, orange peel, rosemary
Tomatoes — basil, bay, celery seed, cinnamon, chili, curry, dill, fennel,  garlic, ginger, gumbo file, lemongrass, marjoram, oregano, parsley, rosemary, savory, tarragon, thyme


Thanks to Frontier Coop for this great information!